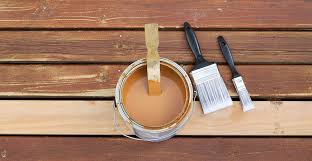
How to Prep Surfaces for Painting or Sealing
Prepping a surface for painting or sealing might seem like a straightforward task, but skipping steps can lead to uneven finishes, peeling, or even wasted time and money. Whether you’re tackling a home DIY project or working on a professional job, properly preparing the surface is key to achieving a smooth, long-lasting result.
This guide will walk you through the essential steps to prep surfaces correctly, including cleaning, repairing, sanding, and priming, setting you up for success before you open that can of paint or sealant.
Why Surface Preparation is Crucial
Before we jump into the step-by-step process, it’s worth understanding why surface preparation is so important. Painting or sealing over a poorly prepared surface can result in weak adhesion, a patchy appearance, or coatings that quickly chip away. A well-prepared surface ensures:
- Stronger bonding between the surface and the paint or sealant
- Longer-lasting results, avoiding costly repairs or touch-ups later
- A professional-looking finish that you’ll be proud of
Spending time preparing your surface is an investment in the quality and durability of your project.
Step 1: Clean the Surface Thoroughly
The first step to any painting or sealing project is to remove dirt, grease, dust, and any other contaminants. These substances prevent paints and sealants from adhering properly.
How to Clean:
- For interior walls: Use a mild detergent and a damp sponge to remove dirt and stains. Be sure to dry the surface completely before moving on.
- For wood: Wipe with a damp cloth to remove dust, then sand lightly to remove deep grime.
- For outdoor surfaces (e.g., concrete or brick): Use a pressure washer for a deep clean, especially if algae or mold are present.
Don’t skip this step—even tiny particles of dust can create bumps and uneven textures when covered in paint or sealant.
Step 2: Repair Any Damage
Cracks, holes, or rust stains on a surface can ruin the final finish, no matter how good your painting skills. Though minor damage might seem insignificant, it can become much more noticeable after painting and compromise the sealant or paint’s durability.
Repair Tips:
- Small cracks or holes in drywall can be filled with spackle and smoothed out with a putty knife. Allow the filler to dry completely before sanding.
- Wood repairs may require a wood filler for cracks or gaps. Use sandpaper to ensure the surface is level after repairs.
- Rust stains on metal surfaces are a major issue since they can cause paint or sealant to flake off quickly. Treat the rust using a quality rust remover before proceeding.
Taking care of these seemingly small imperfections will make a big difference in the end result.
Step 3: Sand the Surface
Sanding may seem like an optional step, but it’s a critical one for achieving a flawless finish. Sanding doesn’t just smooth out the surface—it also creates a texture that allows the paint or sealant to adhere better.
READ MORE : The Art of Creating Irresistible Homemade Sliders
Sanding Guidelines:
- Choose appropriate sandpaper grit:
- Use coarse (60-80 grit) to remove rough layers or peeling paint.
- Opt for medium (120 grit) to smooth out surfaces without over-sanding.
- Use fine (220 grit) for a polished, smooth finish.
- Sand in a circular motion or follow the grain (for wood surfaces) to prevent scratches.
- Always wipe away dust with a damp cloth or vacuum cleaner after sanding.
Remember to wear a mask to avoid inhaling dust particles created during the sanding process.
Step 4: Apply Primer (If Needed)
Applying a primer is often overlooked, but it plays a huge role in ensuring your paint finish lasts. Primers:
- Seal porous surfaces, creating a uniform base for your paint or sealer.
- Enhance color vibrancy, especially if you’re transitioning from dark to light shades.
- Help paint stick to tricky surfaces like metal, plastic, or glossy finishes.
Priming Tips:
- Choose the right primer for your surface:
- Use an oil-based primer for wooden surfaces to block stains.
- Opt for a rust-inhibiting primer for metal surfaces.
- Apply evenly with a brush or roller. Aim for smooth, thin layers to prevent drips.
- If you’re painting a previously coated surface, a primer might not be necessary—do a test spot first to see how well your chosen paint adheres.
Step 5: Test for Moisture (Outdoor Projects)
For outdoor surfaces, moisture can ruin your project before it even begins. Sealing or painting over damp surfaces leads to peeling, so make sure everything is dry. Use a moisture meter to test the surface, especially for porous materials like wood or concrete.
If the surface still feels damp, wait for it to dry completely before picking up the brush.
Step 6: Mask and Protect Surroundings
The final step before you start painting or sealing is to protect areas you don’t want coated. Use painter’s tape to mask edges, trim, or any adjacent surfaces. Cover floors or nearby furniture with a drop cloth to avoid accidental drips or spills.
Investing a little time on this step can save hours of cleanup afterward!
Bonus Tips for Painting and Sealing Success
Now that your surface is prepped and ready to go, here are a few tips to ensure your painting or sealing project is flawless:
- Work in a well-ventilated area to avoid inhaling chemicals and ensure faster drying.
- Use high-quality brushes, rollers, or sprayers for a smooth, even application.
- Follow the manufacturer’s instructions for drying times between coats—patience is key to a professional finish.
Set Yourself Up for a Professional Finish
Proper surface preparation is the foundation of any successful painting or sealing project. By following these essential steps—cleaning, repairing, sanding, priming, and masking—you’ll set yourself up for a finish that’s smooth, long-lasting, and worth the effort.
Don’t cut corners on prep—it’s the difference between a result that lasts years and one that lasts only months. If you’re tackling a project involving rusted metal, start by using a good rust remover to eliminate corrosion and create a clean slate for your paint or sealant.
Taking shortcuts is easy, but when it comes to painting or sealing, putting in the time to prep correctly is always worth it. Now that you’re equipped with the knowledge, get started!